Repair
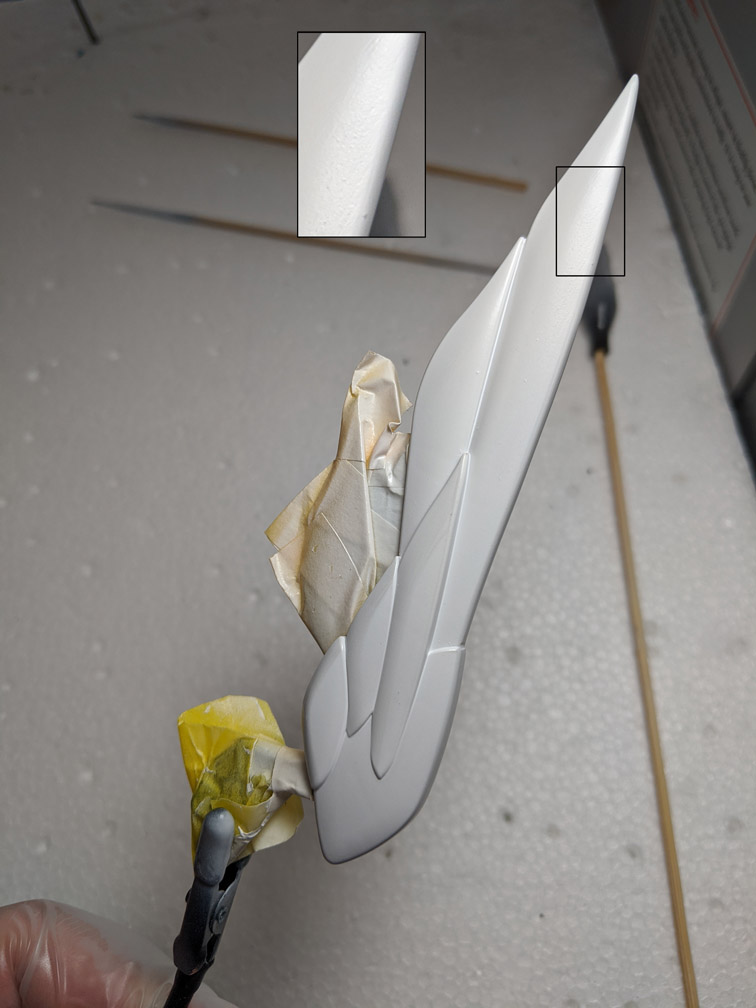
At first glance, the paint removal on the upper wings looked pretty promising.

Most of the black primer was gone on one of the wings but it still had a significant portion left on the other

I took some sanding paper and the pointy end of a bamboo skewer and started scratching the paint off manually. The result was better but it still needed some work.

I'm going to give it another day of windex bath to see if I can remove rest of the black primer. Tomorrow, I'll probably go ahead and start re-priming it white.
Yesterday, I found some large dust particles that landed on my painted surfaces while it was drying. I attempted to remove them by sanding the dust off. Unfortunately, this was before the paint cured so I ended up making a very visibly rough patch on the surface.

I knew applying top coat in this condition will only make the rough surface more visible. So I decided to try something stupid and risky.

I took some high grit sanding paper and sanded very lightly across the rough surface. Since the paint was cured this time (thanks to the heat wave), this process didn't destroy the paint job but it didn't look like it was really improving the looks either...

At the least, the surface was now smooth to the touch so I figured there wasn't much more I can do. Time to apply top coat.
Airbrushing
After applying the clear gloss top coat, I noticed the rough texture was significantly improving.
Now that I've fixed one mistake, the next obvious move was to make another.

Masking
After the top coat on the lower wings dried, I figured it was a good time to remove the masking tapes.

Moment of truth...

... first one came out nicely!
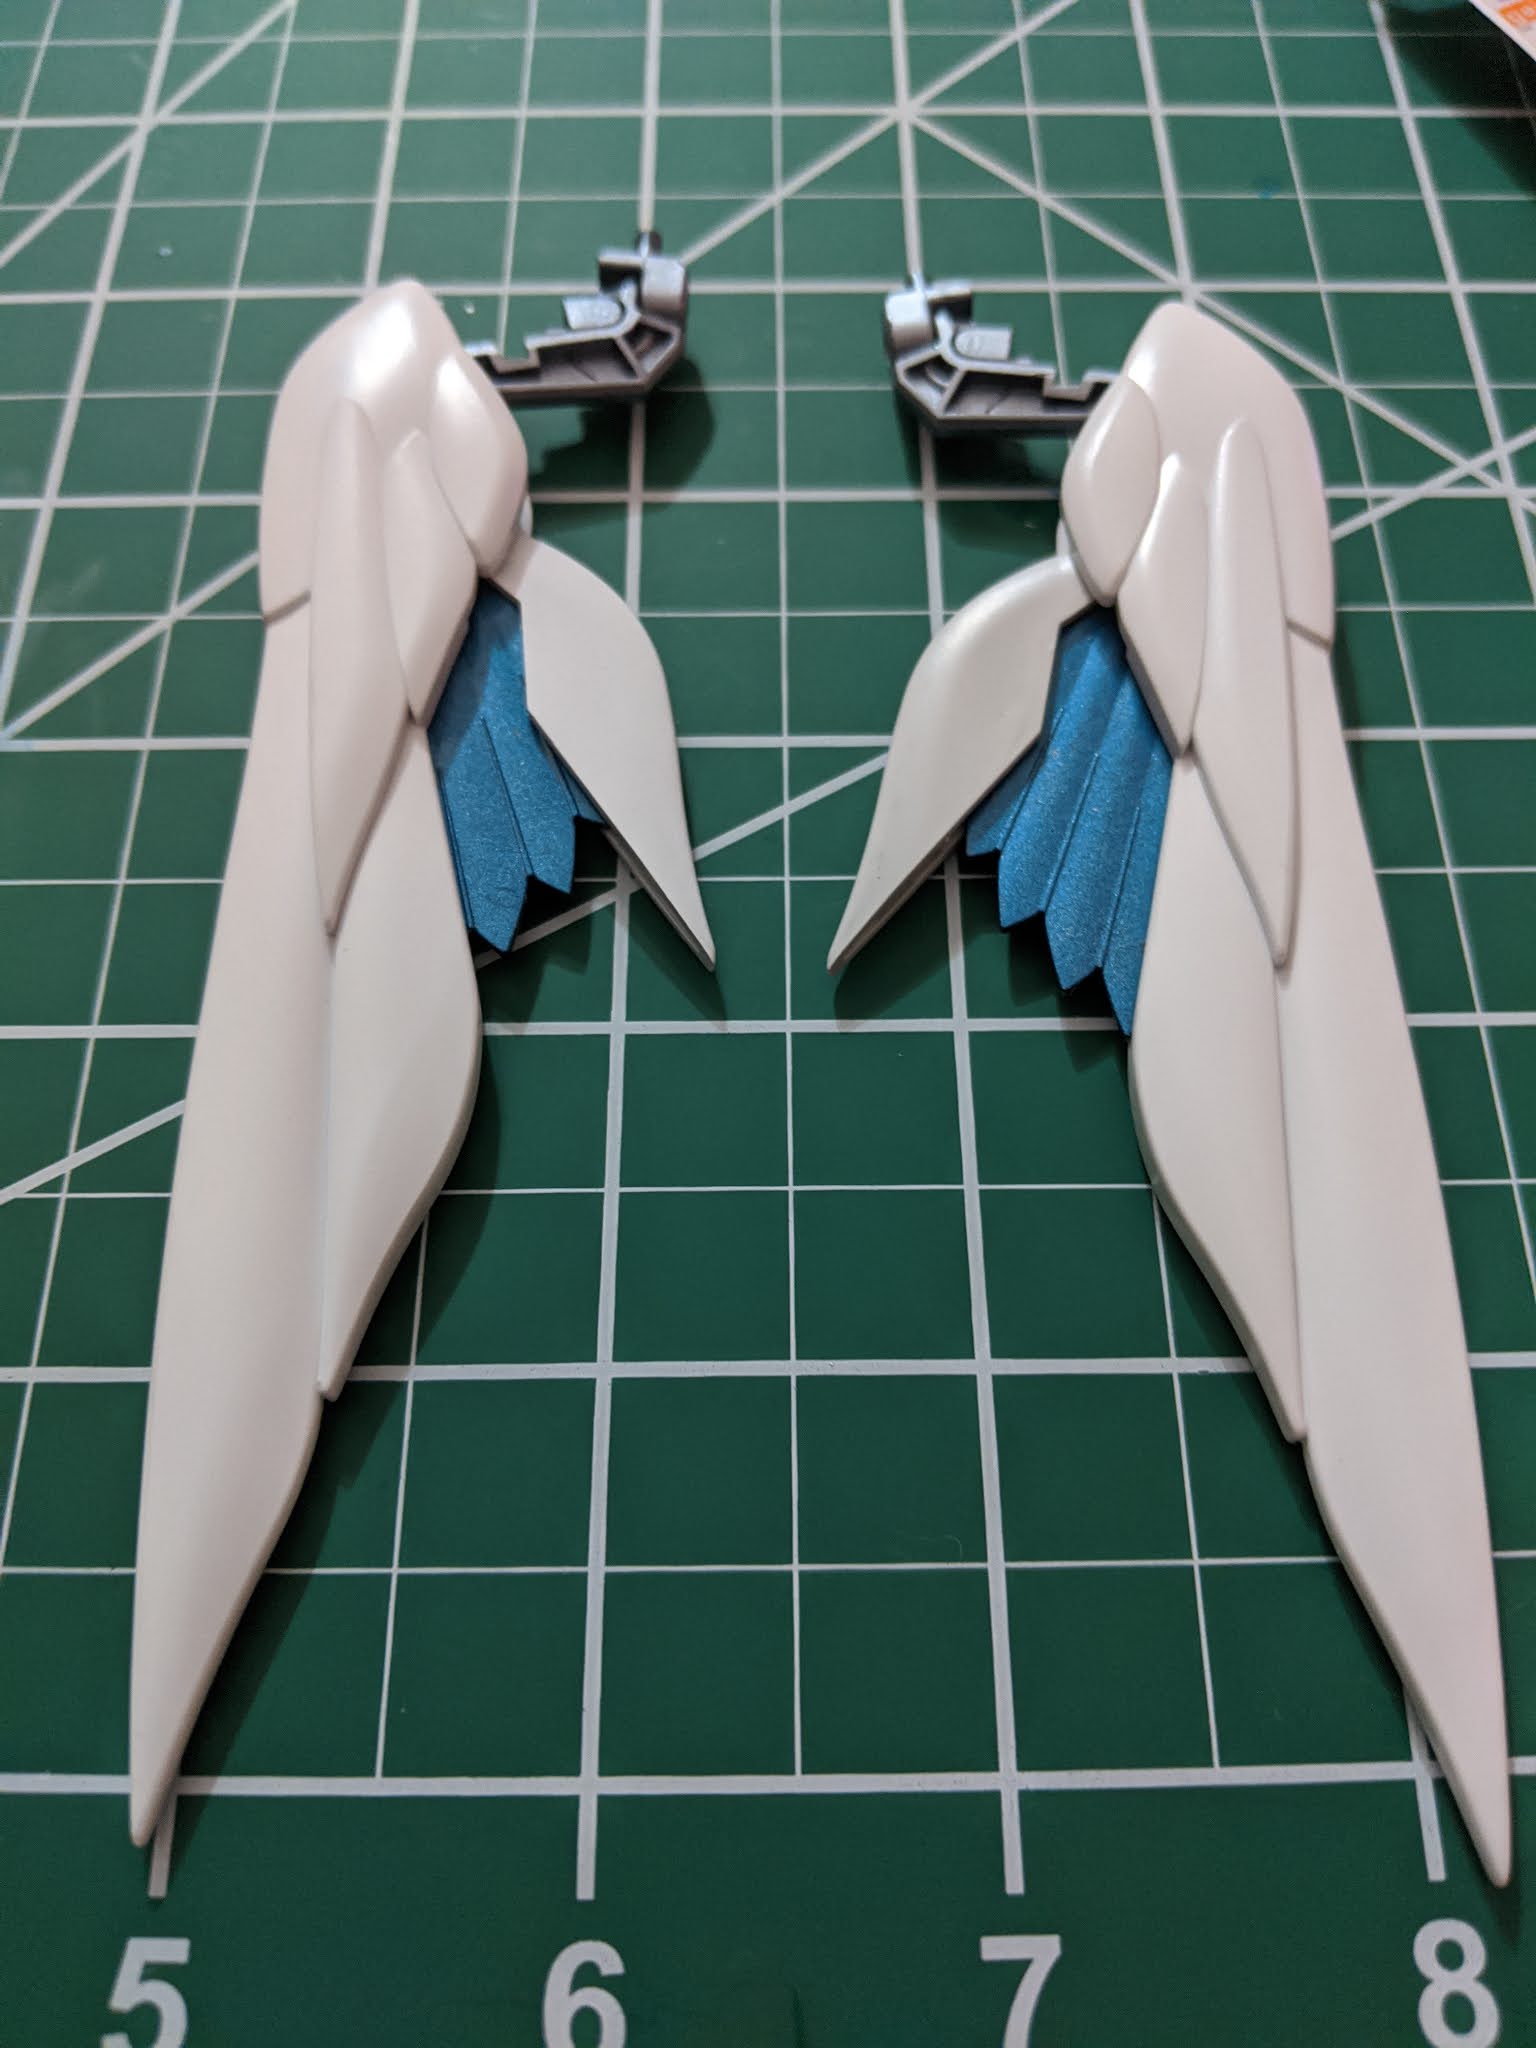
... and so did the second one!
Panel Lining
This part was pretty much the same as last time (without the trial and error). I mixed a few drops of Testors fluorescent blue enamel paint with lighter fluid and a few drops of enamel thinner.

Panel lines for these particular pieces seemed deep enough that I didn't need to worry that they would not apply cleanly.

Here is how they look with the paint dropped into the grooves:

And here is how they look after a cleanup using lighter fluid and a cotton swab:

All in all, I was pretty happy with how they came out but there were a few things that could have gone better.
First, I should have mixed less thinner because it was starting to eat through some of the paint. Hopefully it wasn't enough to turn the plastic brittle and make it crumble when I try to assemble it later (this happened during my previous project). I could improve this next time by using a pipette.
Second, The top coat didn't apply very well on some of the harder to reach edges. As a result, the paint started bleeding out of the grooves and into the smooth surfaces. I will just have to do a more careful job applying top coat evenly next time.
Today I Learned
- Using high grit sandpaper and top coat can help repair some mistakes made during painting
- Always brush off dusts immediately before applying paint or top coat (or find a better dustless environment to work)
- Be careful when adding enamel thinner while panel lining
- Be more thorough with applying glossy clear coat when working with pieces that need panel lining
No comments:
Post a Comment